Today's
project is brought to you by the letter "L". The letter "L"
represents many words, for instance, like, love, live, lovely but most
important to me, it represents the word LaRue, my family name.
I
have acquired quite a few of these "flip off caps" from work and have
been storing them for well over a year now and have been waiting for the
perfect opportunity to use them. If you are in the medical field and have
access to these little caps then by all means use your imagination and get
creating.

Supplies needed:
 ·
Various size and colors of
"Flip off" caps (from medicine vials)
·
Various size and colors of
"Flip off" caps (from medicine vials)
· A
wooden letter (mine came from Hobby Lobby for around $1.69)
· Acrylic
Paint ( I used yellow but any color will work)
· Sponge
applicator for the painting
· Hot
glue gun with glue stick
· 2
inch ribbon to make a loop hanger
Directions:
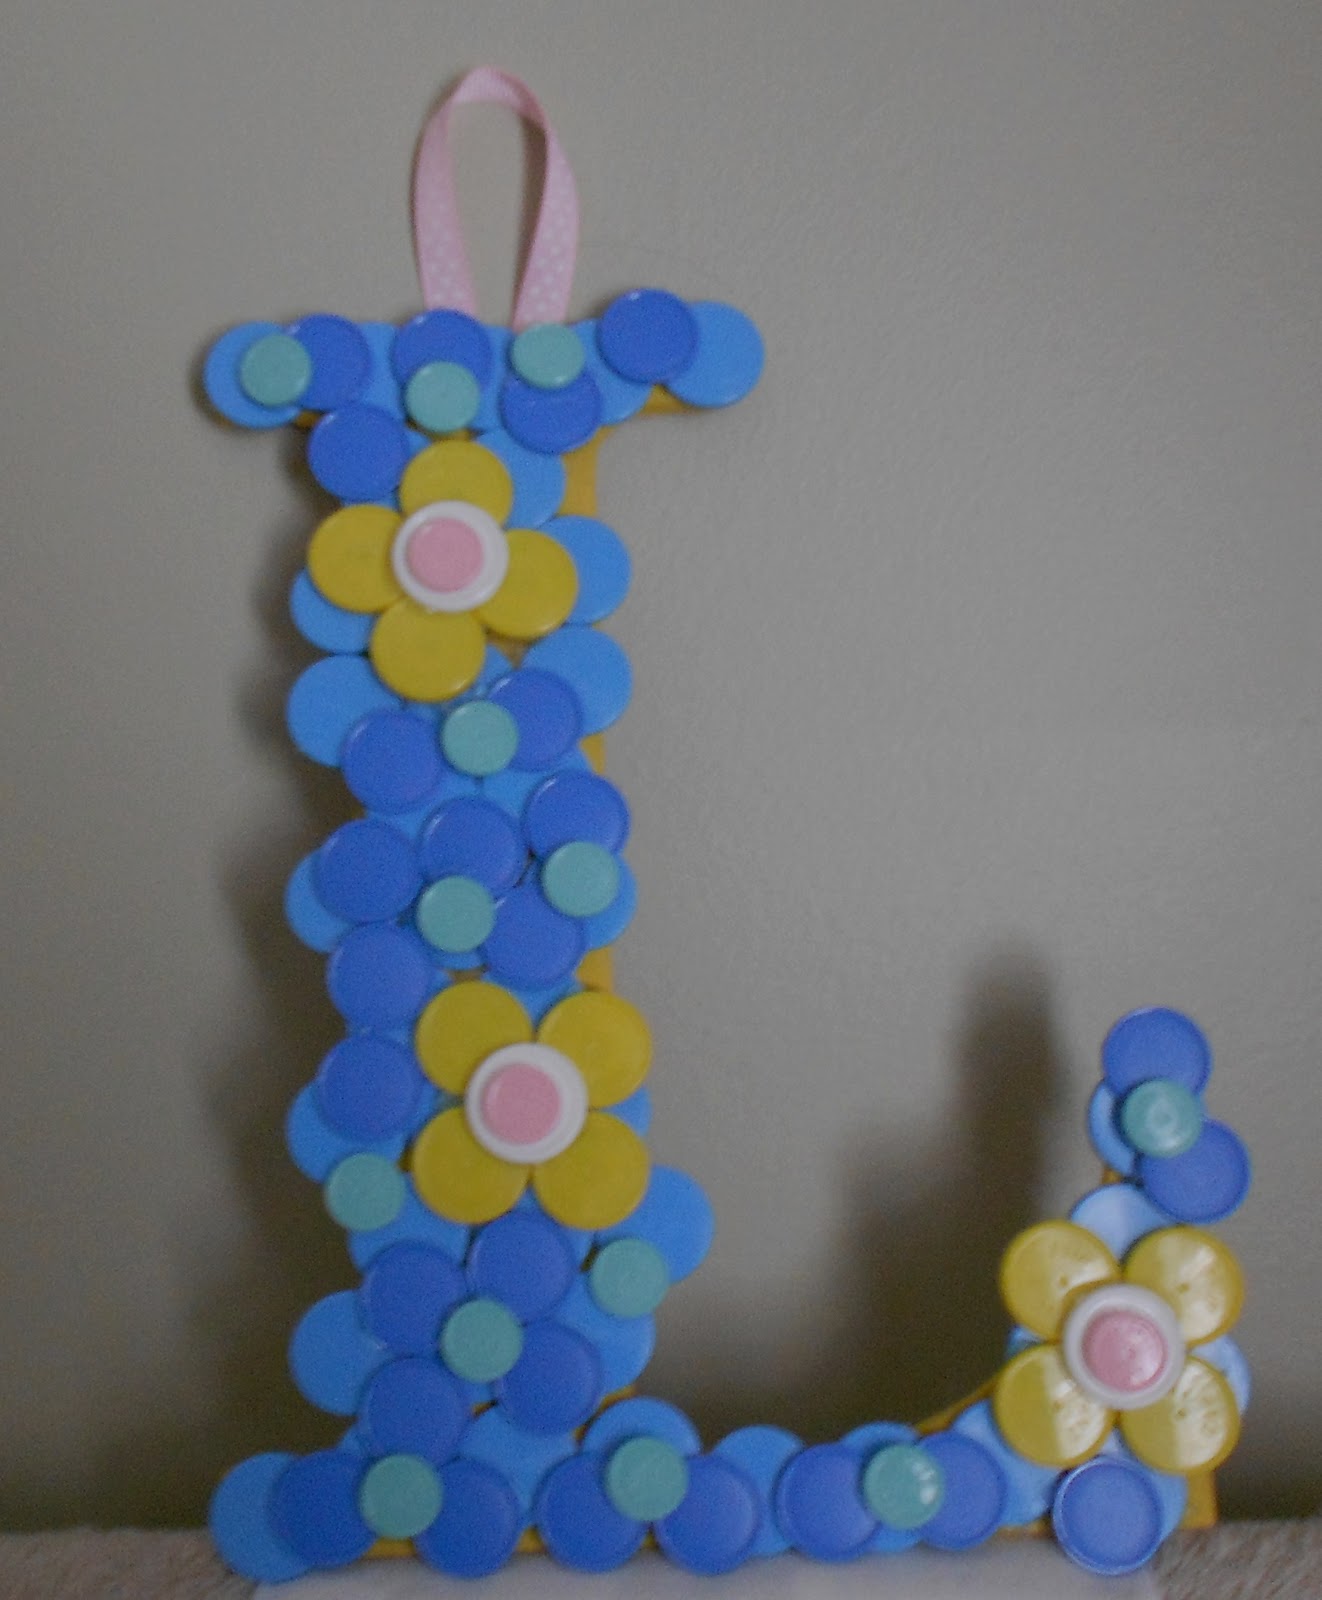
 First
things first! I painted my "L"
yellow, knowing that some areas would not be covered with the round caps. Next
I decided on a color scheme to work with. I chose blue as my back drop and
made yellow, white and pink flowers. I added a few small light green caps on
the blue backdrop for a pop of color. Hot glue your backdrop color on the
letter. Next design a flower and hot glue on top of your backdrop. After the
caps have finished drying completely, turn the letter over and adhere the
ribbon with hot glue for your hanger.
First
things first! I painted my "L"
yellow, knowing that some areas would not be covered with the round caps. Next
I decided on a color scheme to work with. I chose blue as my back drop and
made yellow, white and pink flowers. I added a few small light green caps on
the blue backdrop for a pop of color. Hot glue your backdrop color on the
letter. Next design a flower and hot glue on top of your backdrop. After the
caps have finished drying completely, turn the letter over and adhere the
ribbon with hot glue for your hanger.
You
are finished! It’s a pretty simple project and costs a minimal amount to make.
Since I already had all the supplies except for my letter it costs me
$1.69. I hung my masterpiece in our guest bathroom to give it a pop of
color for the spring!
Thanks
for stopping by! I'm off to see what other letters I can make and give away!


